Do you want to be informed on new Posts on this Thread? (members only)
| S&S Swan Maintenance - G10 or G11 on a mast foot |
|---|
|
Join Date: 05 August 2010
Posts: 164 |
||
|---|---|---|
|
G10 or G11 on a mast foot The second owner of our 48 had discovered galvanic corrosion on the mast foot in the early 1990s. The mast was then treated by cutting the bad part off (about six centimeters) and by fixing a wooden plate inside the mast as a water stopper (water would not run through to the bottom but would drain out of the mast through holes above the shoe collar. I am not sure whether the lowest part was reinforced -- what remains in substance is still inconclusive.
What we plan now is to cut another piece off the mast (sigh) and build an extension that will be fixed inside the mast with a sleeve. The extension should be long enough to make the pedestal obsolete, giving the mast its original length back. In addition, I would like to have the mast base plate made of G-plate (G11 or G10) so there will be no more corrosion in this area. Twice is enough. The steel pedestal will be removed, the affected areas of the steel frame cut out and replaced, and the stainless steel shoe brought back down to the steel frame. I hope we do not find that the damage in the frame is already so spread that we have to replace the complete frame -- that is yet to be determined. Long text, no question? Well, any comments on the procedure are highly welcome. In addition, if anyone knows what the required G-Plate thickness would be, I would be grateful for this input. Lars has also commented in an earlier thread that on one (larger) Swan the complete steel frame has been replaced by a G10 frame. Lars, do you know the specifications or have any further information? In any case, I will post further details once we are underway with the repair. Best regards,
  |
|
Join Date: 01 March 2007
Posts: 147 |
||
|---|---|---|
|
Hi Martin,
|
|
Join Date: 27 January 2011
Posts: 140 |
||
|---|---|---|
|
This is our solution to a similar problem: the mast was corroded at the bottom and could not be unstepped anymore. It was cut, and a sleeve was added. Christian IF 411/028 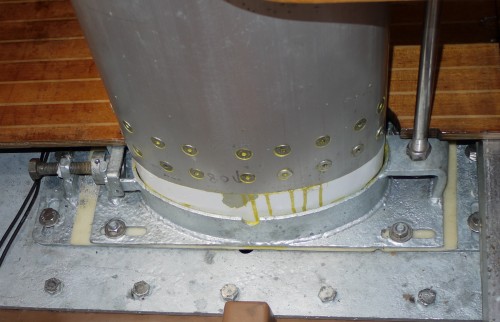 |
|
Join Date: 30 January 2007
Posts: 462 |
||
|---|---|---|
|
Hi Christian, |
|
Join Date: 02 January 2008
Posts: 1547 |
||
|---|---|---|
|
Martin |
|
Join Date: 02 January 2008
Posts: 1547 |
||
|---|---|---|
|
Martin |
|
Join Date: 27 January 2011
Posts: 140 |
||
|---|---|---|
|
Hi Daniel, I looked at a number of photos before and after the repair, and there were no additional bolts before. Thank you for the hint though, I will look into this. Christian IF 411/028 |
|
Join Date: 05 August 2010
Posts: 164 |
||
|---|---|---|
|
Lars,
|
|
Join Date: 02 February 2007
Posts: 202 |
||
|---|---|---|
|
Dear all.
 |
|
Join Date: 05 August 2010
Posts: 164 |
||
|---|---|---|
|
Dear all, thanks for your input! After lots of long discussions with the rigger, some backup information from Lars and some nights with bad sleep, we have decided on a repair that will hopefully get rid of this problem.
Martin
|
|
Join Date: 05 August 2010
Posts: 164 |
||
|---|---|---|
|
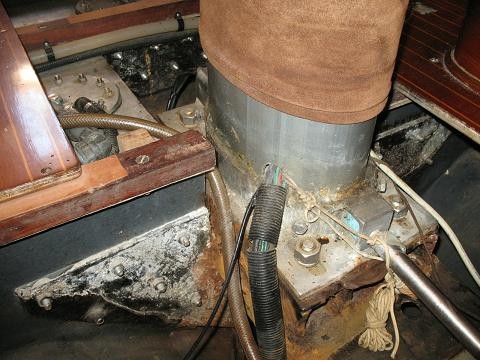
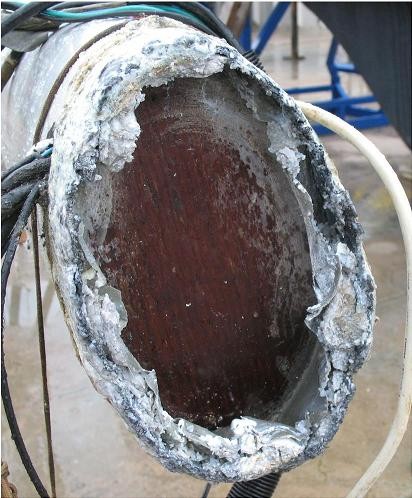
Dear all, as you will perhaps recall, we had to undertake a major repair this winter, as we found the steel frame supporting the mast badly corroded. Unfortunately, the frame was not the only problem - the mast foot was also severely corroded where it had been standing in its stainless steel shoe for two decades. In addition, we found more corrosion beneath the wooden halyard cleats -- actually something that worried me a lot, since they are all on the same level and seemed dangerously like a perforation line ...
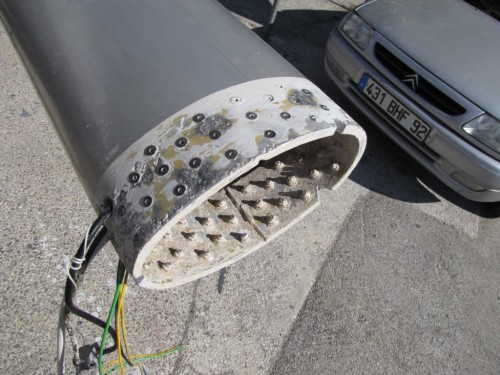
We addressed the mast problems with custom-made aluminium parts. A ring cut away from the damaged mast part gave us a clean edge to work on as well as a template of the mast profile. With this template ring, two half-sleeves were made. Together they form a sleeve that sits underneath the halyard cleat ring. The sleeves are bolted into the mast (see pics) so that the aluminium thickness at this point is twice five millimeters now so I am less nervous about the perforation line. And the halyard cleats are bolted through both mast and sleeve. For the corroded mast foot, we had a new foot made -- in solid aluminium, bolted into the cut end of the mast. The new base plate (yes, aluminium!) is a solid plate with two massive bolts that go into corresponding holes in the mast foot. Water can run out along the bolts, and as the base plate has no rim, it runs right down into the bilge.
Martin
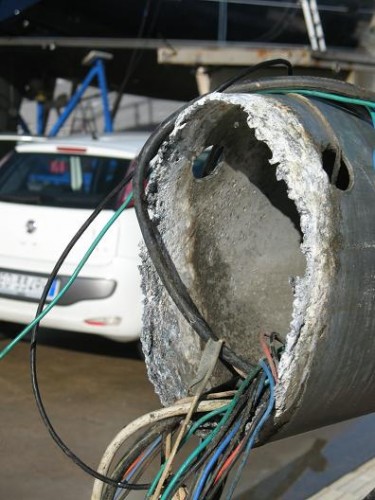 The corroded mast foot after cleaning 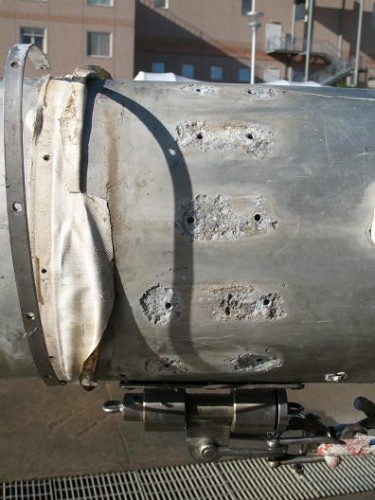 Corrosion beneath the halyard cleats 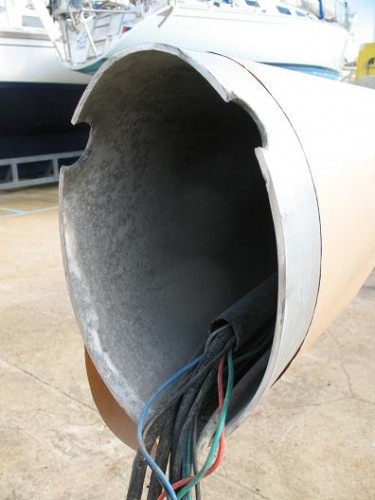 Mast foot after cutting |
|
Join Date: 05 August 2010
Posts: 164 |
||
|---|---|---|
|
More pics of the repair ... 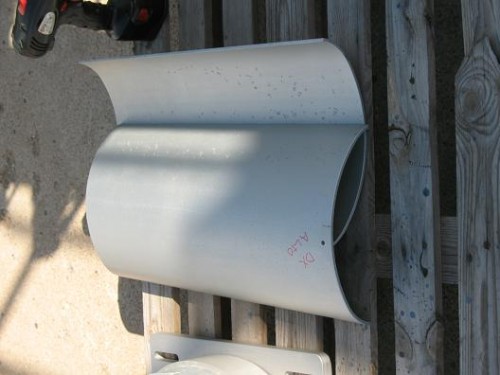 The sleeve halves for the cleat ring 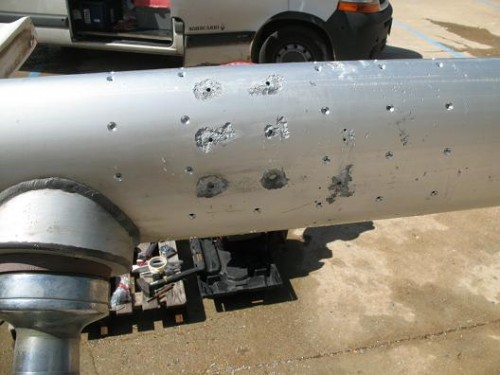 Sleeve ready to be fixed inside |
|
Join Date: 05 August 2010
Posts: 164 |
||
|---|---|---|
|
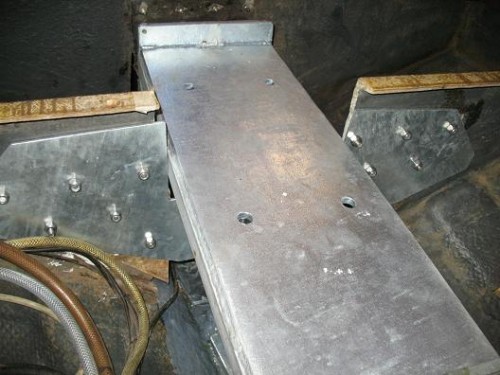
Pics of the new mast foot ... 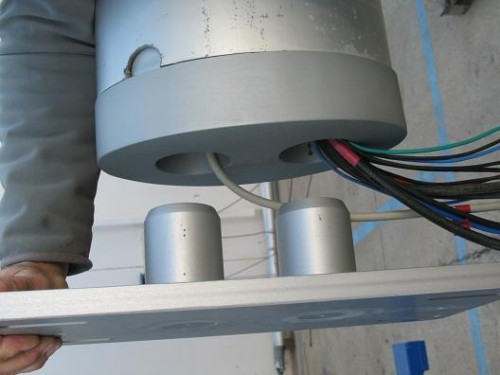 New foot and shoe (or base plate) 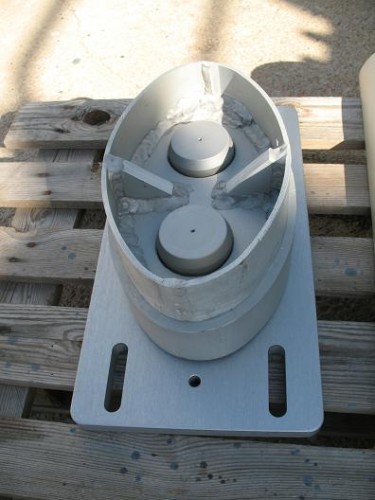 ... in detail |
|
Join Date: 05 August 2010
Posts: 164 |
||
|---|---|---|
|
The other problem was the steel frame. As a replacement of the complete frame (which is rather huge) was neither necessary nor very tempting, we just had the bad part cut out of the frame. Sounds much easier than it was, actually.
to be continued in the next post ... 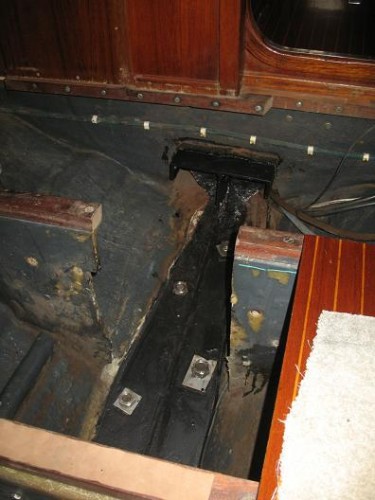 The damaged part of the frame cut out 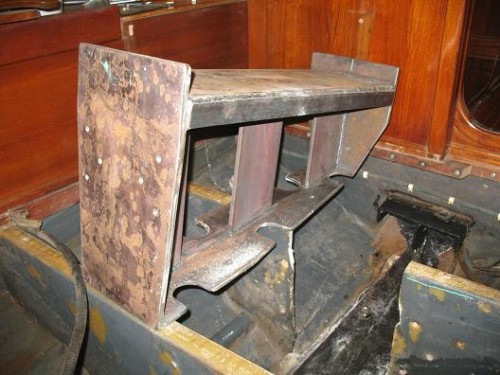 ... and the new part, fitted before galvanization 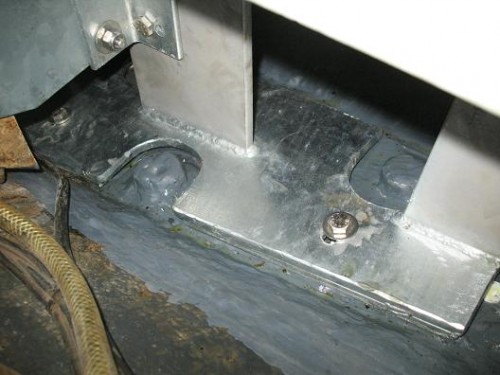 Detail of the base plate of the new piece with keel bolts |
|
Join Date: 05 August 2010
Posts: 164 |
||
|---|---|---|
|
The last pictures show the steel frame in position. As the new aluminium base plate does not have the adjusting screw of the old stainless shoe, the frame has two extensions at the front and back ends. To position the mast, we placed a hydraulic press against the extension and slid the complete base-plate-and-mast ensemble into position.
Martin
 The new steel frame 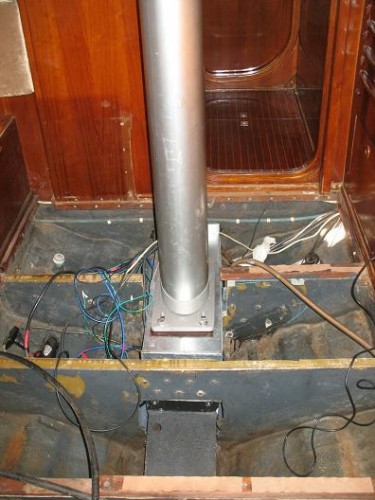 ... and everything assembled! |
|
Join Date: 27 August 2014
Posts: 17 |
||
|---|---|---|
|
Hello Martin
I'd like to get a copy of the templates for the Swan 48 mast step. Can you put me in touch with whoever built yours?
Larry |
|
Join Date: 27 August 2014
Posts: 17 |
||
|---|---|---|
|
Lars and All: Can you suggest a process to remove corrosion from the mast step in my Swan 48 without removing it from the boat? Also, my mast step has a plate passing under and bolted to the forward side of the bulkhead forward of the mast. Is that how these boats were built?
Larry |
|
Join Date: 02 January 2008
Posts: 1547 |
||
|---|---|---|
|
Dear Larry
|
|
Join Date: 25 July 2008
Posts: 30 |
||
|---|---|---|
|
Dear All,
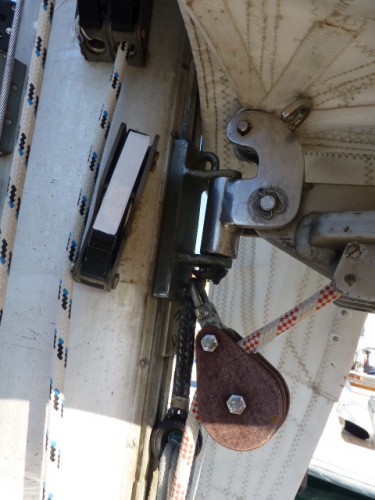 System on 44 with a rail 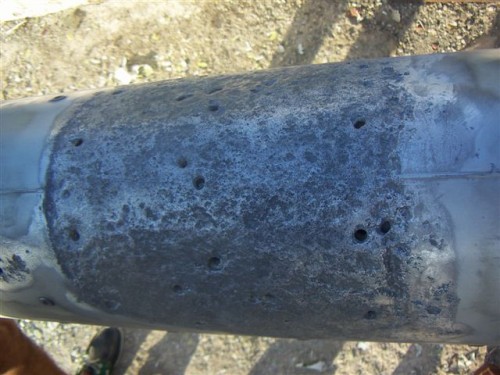 situation of RUMTRADER after sanding the mast |
|
Join Date: 30 January 2007
Posts: 462 |
||
|---|---|---|
|
I cannot say anything about the feasibility of changing the gooseneck support from the large flange to the rail because it is a matter of mechanical strength difference that only an expert can judge. For sure I can affirm that no stainless flange is ever put in direct contact with the aluminum of the mast; there must be always an isolating layer between them and, as far as I know, Nautor always complied to this basical rule. |
|
Join Date: 02 February 2007
Posts: 202 |
||
|---|---|---|
|
Hello dear Swan fans!
|
- Threads : 1715
- Posts : 10273
- Members: 823
- Online Members: 0