Do you want to be informed on new Posts on this Thread? (members only)
| S&S Swan Maintenance - Osmosis |
|---|
|
Join Date: 01 July 2013
Posts: 7 |
||
|---|---|---|
|
Osmosis I am at the moment looking into the idea of buying a swan, build 1980. Therefore, I would like to know more about experiences people have with their swans in relation to osmosis. How was the building technique at that time? Were there any procedures on how to prevent osmosis? How many of you have seen results from osmosis survey? Are there any particular models that are known for osmosis issues rather than others? Or is there some part of the hull which typically gets osmosis? All information on the subject is more that welcome. Thank you very much in anticipation. |
|
Join Date: 28 July 2008
Posts: 79 |
||
|---|---|---|
|
I have seen some survey results. Surveys are often done visually and utilising a moisture meter to check particular locations. This will give you an indication of the moisture content at the spot the measurement was taken only. If you have any concerns that the vessel you are looking at has osmosis, I would suggest a theomorphic survey. It will show you were there are imperfections in the hull; once you know where to look, you can then go and investigate that particular spot. Hope that helps. Adrian GBR3369T
|
|
Join Date: 20 March 2011
Posts: 88 |
||
|---|---|---|
|
|
|
Join Date: 02 January 2008
Posts: 1547 |
||
|---|---|---|
|
Dear Tony and One-a-be
|
|
Join Date: 01 July 2013
Posts: 7 |
||
|---|---|---|
|
Gentlemen, Thank very much indeed for the clarifications! The conclusion is to either get the full history of the vessel or get a survey performed. Thank you so much for the replies. |
|
Join Date: 01 July 2013
Posts: 7 |
||
|---|---|---|
|
Hello again,
|
|
Join Date: 27 September 2012
Posts: 38 |
||
|---|---|---|
|
Here you can find the anti-osmosis treatment on our Swan 44 from 1973: http://www.repoman.be/tags/osmose-behandeling
|
|
Join Date: 16 April 2011
Posts: 31 |
||
|---|---|---|
|
Dear All, With all the lockdowns and travel restrictions we’ve been having in Melbourne, my S&S Swan 43 Firebrand II (43/41) has not been getting as much attention or use as I would have liked. She is currently up on the hard-stand for minor repairs and to have new anti-fouling applied. When she first came out of the water there were numerous small osmosis bubbles along the sides of the trim tab (as below) and along the leading edge of the rudder and rudder skeg. These don’t appear to be too much of a problem. They have been sanded back hard and are currently being dried before sealing with epoxy. The rest of the hull looked in pretty good shape. (I had some small osmosis blisters repaired the last time she was out of the water.) There were, however, several larger blisters along the centreline from about 300mm below the waterline at the bow, back to the leading edge of the keel. Once these were opened up, there was evidence of moisture within the laminates (as shown below). We continued to open-up the surface layer to see if we could get back to dry glass. It soon became apparent that seawater had seeped into the surface laminates most of the way from just below the water line to the keel (as below). We are currently opening a strip of the surface approximately 350 mm wide from about 300 mm below the waterline at the bow back to the front of the keel. We’re proposing to then dry the area out before rebuilding it with up to four layer a glass and epoxy. My question (especially to Lars) is whether such an approach will be adequate, or whether there is more we should be doing? Best regards Andrew 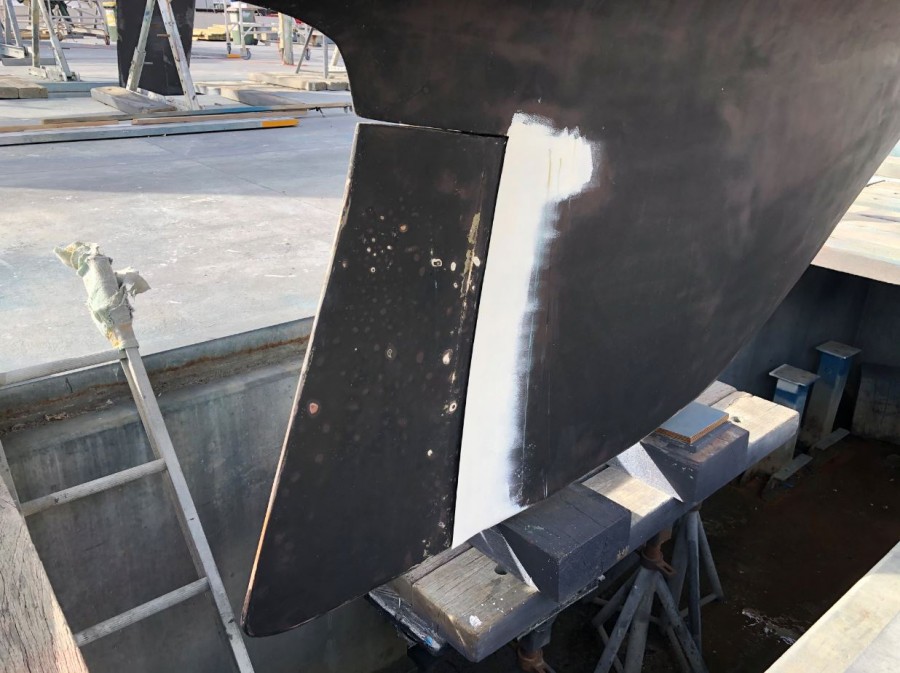 Bubbles along the trim tab  Blisters along centreline after opening-up 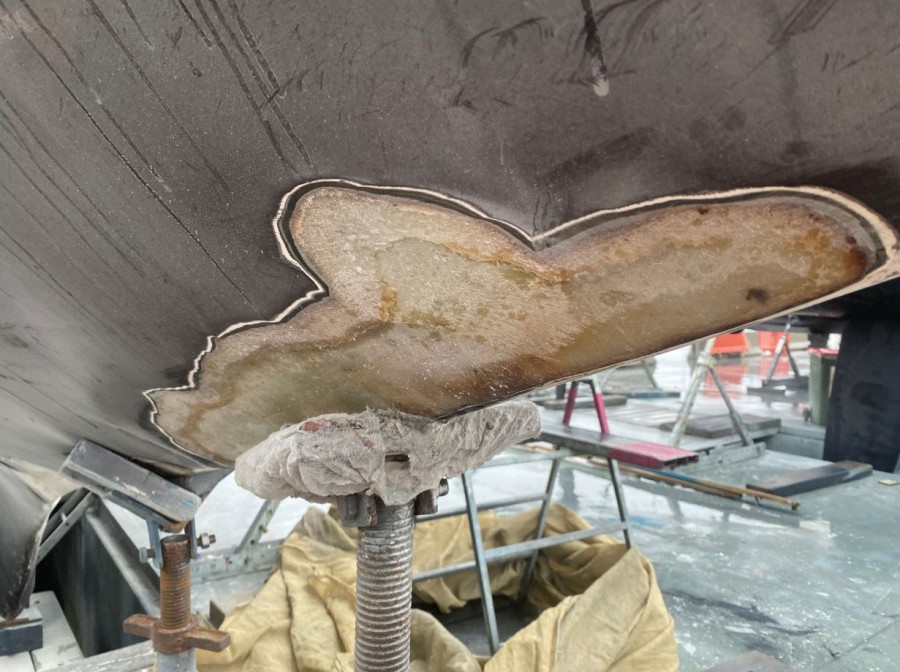 Blister on starboard side after opening-up |
|
Join Date: 02 January 2008
Posts: 1547 |
||
|---|---|---|
|
Dear Andrew It sounds like water got into the centerline hull joint, and stayed there for a long time.
The affected layers to be removed, and replaced with epoxy laminate.
Kind regards
Lars
|
|
Join Date: 16 April 2011
Posts: 31 |
||
|---|---|---|
|
Dear Lars, Thank you for your prompt response. That confirms what we need to do. I have a suspicion that some of the water was probably there the last time we had her out of the water and that we only carried out superficial repairs around the surface blisters. We need to do the job properly this time. Do you have any information on how the centreline hull joint is made up? Is there anything in particular that we need to look out for? We want to remove all of the affected glass without causing unnecessary damage. Best regards Firebrand II (43/41) |
|
Join Date: 02 January 2008
Posts: 1547 |
||
|---|---|---|
|
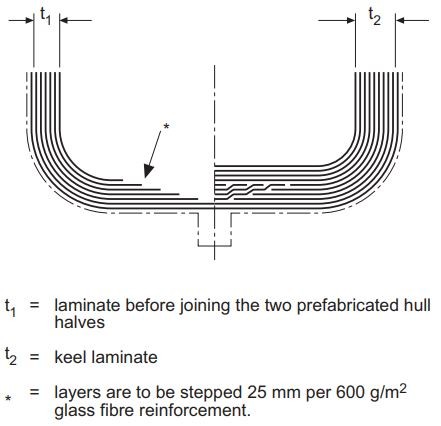
Dear Andrew Enclosed pls find a sketch of the hull joint
First the hull halves are laid up separately, tapering their edges towards the centerline.
Then the hull halves are moved together, and the tapered area filled up with plies of corresponding width and bridging the joint. Finally additional plies laid across the joint.
Best regards
Lars
 |
|
Join Date: 16 April 2011
Posts: 31 |
||
|---|---|---|
|
Dear Lars, That is most helpful. Thank you so much for your assistance. We're back to grinding today and hope to be ready for epoxying and glassing early next week. I'll let you know how we get on. Best regards |
|
Join Date: 16 April 2011
Posts: 31 |
||
|---|---|---|
|
Dear Lars, The problem appears to have started from an earlier repair to the bow. Water had penetrated between the original lay-up and the repair. We ended up having to cut a lot of damaged glass out of both sides of the hull to get back to sound material. This was done in a 300 to 400 mm wide strip on both sides of the hull from just below the waterline to the front of the keel. The join was then repaired with many layers (>25 in places) of glass and epoxy. The attached figure shows the repaired starboard side ready for fairing. The second figure shows the completed work on the port side. She should be at least as strong as when she first left Pietarsaari. We just have to finish touching up the paontwork on the topsides and she should be ready to go back in the water later this week. Many thanks for your help Andrew
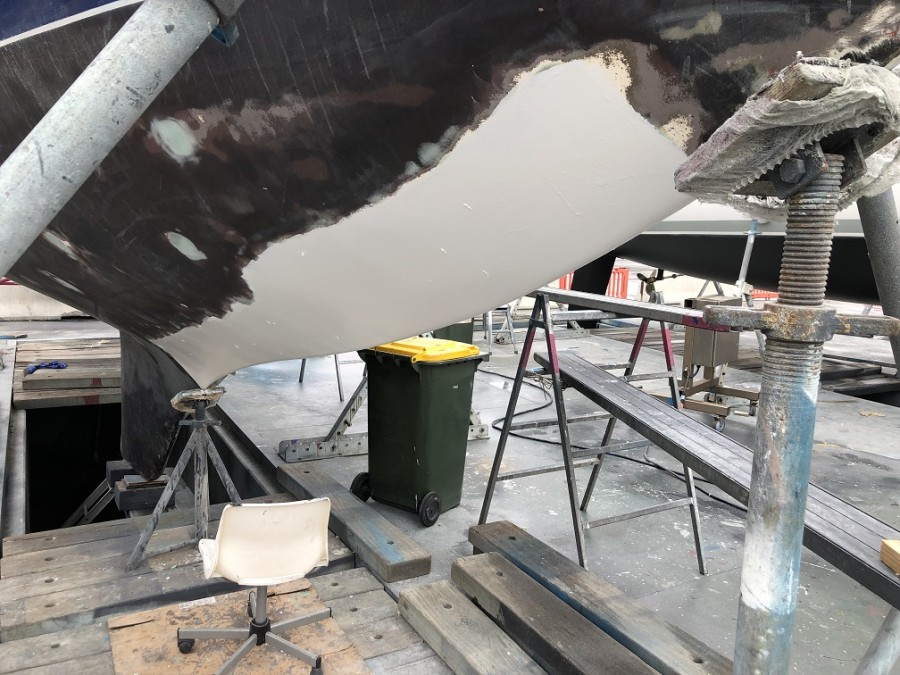 Port side repair ready for fairing  Starboard side after anti-fouling |
- Threads : 1715
- Posts : 10273
- Members: 823
- Online Members: 0