Do you want to be informed on new Posts on this Thread? (members only)
| S&S Swan Maintenance - Fixed Window Frames |
|---|
|
Join Date: 05 February 2007
Posts: 102 |
||
|---|---|---|
|
Fixed Window Frames |
|
Join Date: 06 January 2012
Posts: 67 |
||
|---|---|---|
|
Hello Jayne and other forum members!
 2014 at the Baltic sea, far away from the Italian SUN! |
|
Join Date: 06 January 2012
Posts: 67 |
||
|---|---|---|
|
Sorry, I forgot to mention one important thing. The filler I used to the thickened epoxy at my final restoration was silica dust, recommended by West Systems when glueing metal-to metal or used as a very strong filling. This white silica dust is almost lighter than air and consists of very small dust like particles so You have to wear a mask not inhalate it by mistake. |
|
Join Date: 01 July 2010
Posts: 48 |
||
|---|---|---|
|
Ciao Jayne,
|
|
Join Date: 01 July 2010
Posts: 48 |
||
|---|---|---|
|
Here is a photo of the stainless window frames on SHAITAN 65013....  |
|
Join Date: 02 January 2008
Posts: 1547 |
||
|---|---|---|
|
Dear Jayne
|
|
Join Date: 05 February 2007
Posts: 102 |
||
|---|---|---|
|
Thank you Lars, Michael, and IHe for all of your considerations. We will be evaluating all as when we remove the existing ones to see the state that they are actually in. Was originally leaning to Inox, but it is far too expensive here to do it well so probably will choose one of the other solutions. Thanks again. Jayne Aorangi 47/047 |
|
Join Date: 06 January 2012
Posts: 67 |
||
|---|---|---|
|
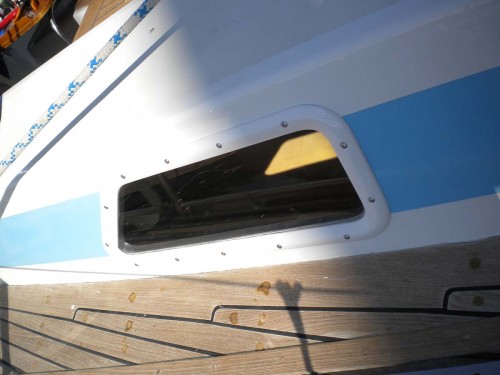
Hi Jayne, from my experience I'd go the restoration route again if I had to choose. The original frames are quite strongly built from GRP and the cracks were only superficial and easy to fix with silica thickened epoxy. Their purpose is cosmetical only and has nothing to do with holding the actual windows in their places.
|
|
Join Date: 29 January 2007
Posts: 1033 |
||
|---|---|---|
|
Dear Jayne,
|
|
Join Date: 01 July 2010
Posts: 48 |
||
|---|---|---|
|
Dear All,
 |
|
Join Date: 30 November 2011
Posts: 18 |
||
|---|---|---|
|
Hi all
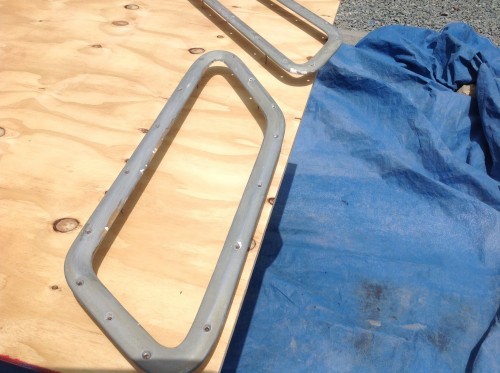 Before respray 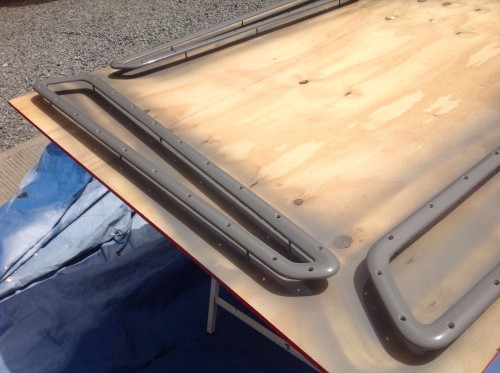 After first coat |
|
Join Date: 29 January 2007
Posts: 1033 |
||
|---|---|---|
|
Dear All, I have now the very same problem. I tried to dismantle the two fixed GRP frames, but unfortunately some previous shipwright, in 2000, glued them so well that they are getting in pieces when we try to get them out. I tried to find someone who could work with G-10 as suggested by Lars but could not find one, at least not in Italy and among the reliable people I know. I now have two options: 1- rebilt the frames in polished stainless steel 2- rebult the frames in anodized alluminum. I would go for the second choice, but would like to hear comments from you friends Thanks a lot! Fair winds matteo (47/069 Vanessa) |
|
Join Date: 05 August 2010
Posts: 164 |
||
|---|---|---|
|
Dear Matteo, in any case, I hope you can save the old frames to use as a template. When taking the old frames off 48/039, I encountered the same problem as you -- they were glued in very well and everything but easy to get off. It took a lot of patience, slow work, a number of wedges and very thin cutting blades. Fortunately, I could save them all. I then spent a lot of time getting rid of the silicone ... In comparison to the original GRP frames, G10 or G11 is much less flexible. The material is very stiff, very strong, quite heavy, very hard, but surprisingly easy to work. It is perfectly possible to cut it with a saw, but I would then suggest a bandsaw. G-Plate is also easy to shape with a belt sander. The hollow inside of the frames can be created with a Dremel-like tool. The most important thing is that you do not really need someone who is familiar with the material. Anyone who can produce a wooden frame could work G-plate. You could probably do it yourself, if you dare to tackle something that is so openly visible ... I used G11 to replace one of the aluminium backing plates for the deck padeyes (see pic). The backing plates are not something I'd normally check, as they are glassed in, but I had major deck work and had to open the ceiling to get at the nuts -- and found this one backing plate corroded. So I made a replacement part. It took maybe half an hour cut the part and to get it to fit, but of course, nobody will see the part on the boat so I did not spend a lot of time on finer work. I did other pieces as well, but have no pics. So, do not be afraid of G-plate. It is actually quite easy to work with. I simply ordered a sheet and cut as needed. However, being so strong, the frames would be very stiff and not easy to bend. The old ones are actually quite flexible. I am not sure how important that difference is, but Lars would know -- it will depend on the curvature of the fixed windows (which, on a 48, are completely flat, but I do not know about the 47). Best, Martin
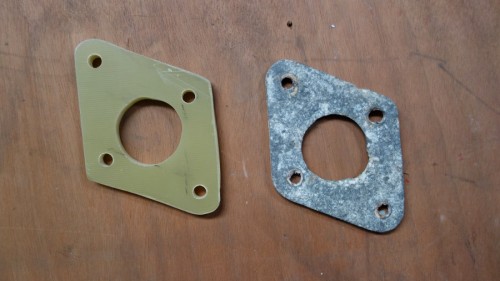 Backing plate for padeye |
|
Join Date: 29 January 2007
Posts: 1033 |
||
|---|---|---|
|
Dear Martin, thanks a lot, you are always very helpful and knowledgeable! Where could I buy G-10 ar far as you know? Fair winds matteo (47/069 Vanessa) |
|
Join Date: 29 January 2007
Posts: 1033 |
||
|---|---|---|
|
last minute update: They finally got out in one piece, in perfect shape! So, I now have just to fill in the small old cracks and paint them. I am interestend in finding G-10 anyway, as backing plate, so, looking forward to hering from you soon dear Martin! Thanks a lot and fair winds! matteo (47/069 Vanessa) 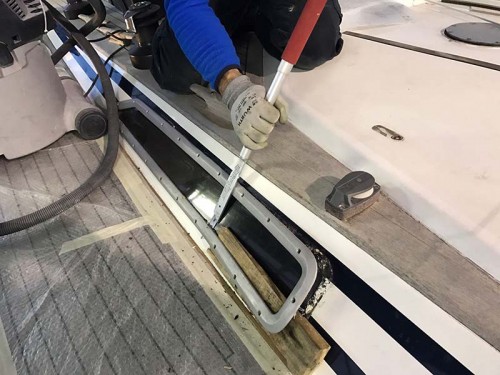 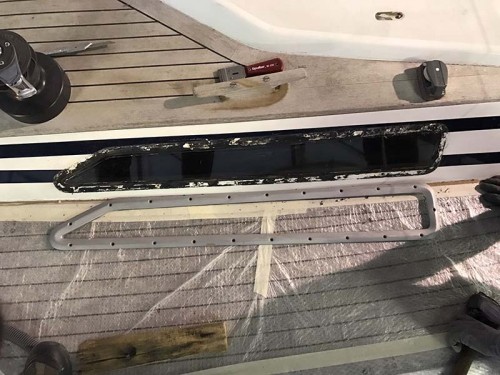 |
|
Join Date: 05 August 2010
Posts: 164 |
||
|---|---|---|
|
Dear Matteo, congratulations for getting the frames off without breaking them -- that is certainly the very best solution! I ordered G-plate from Masterplatex in Germany (www.masterplatex.de). I will attach the full link below. They do have an English version on the website, but unfortunately it looks very much like a computer-generated translation of some of the German information. In the case of G11, only the title line was translated, but none of the technical information. So if you are interested, I would be willing to translate the pertinent information. Fair winds and deep waters, Martin |
|
Join Date: 02 January 2008
Posts: 1547 |
||
|---|---|---|
|
Dear Matteo and All Swan 47 Owners Nautor Spareparts inform that they can still supply the GRP side window frames for this model.
Kind regards
Lars
|
|
Join Date: 05 February 2007
Posts: 102 |
||
|---|---|---|
|
Dear Matteo and All Swan 47 Owners Nautor Spareparts inform that they can still supply the GRP side window frames for this model.
Kind regards
Lars
Thank you Lars, That certainly is good news for all. Luckily we were able to take the restoration route for Aorangi, and congrads Matteo for the same option becoming available. They are a lot stronger than they look...I still have a question regarding the alluminum/alloy profile that was around the inside of the window. We were not able to save these, so wondering how others resolved this, if resolved. I hung curtains...Jayne / Aorangi 47/047 |
|
Join Date: 29 January 2007
Posts: 1033 |
||
|---|---|---|
|
Dear Martin, thanks a lot, of course I will ask your help if I can't get it, but hope not to bother you with this! :-) Fair winds! matteo (47/069 Vanessa) |
|
Join Date: 29 January 2007
Posts: 1033 |
||
|---|---|---|
|
Dear Jayne, wouldn't be possible to get new frames in wood instead of the original aluminum ones? I can imagine with some time dedication and patience you could get templates from the old one and cut new wooden frames. Fair winds! matteo (47/069 Vanessa) |
|
Join Date: 16 February 2007
Posts: 199 |
||
|---|---|---|
|
God day dear all,
Two years ago, I had to do something about the window frames on Farouche. The original one were not leaking but quite worn out. To make a long story short, I opted for brushed stainless steel frames with a proper sealing. The result is very good and the look is very nice. There is no reason for them to leak if the seal is right. Please see pics 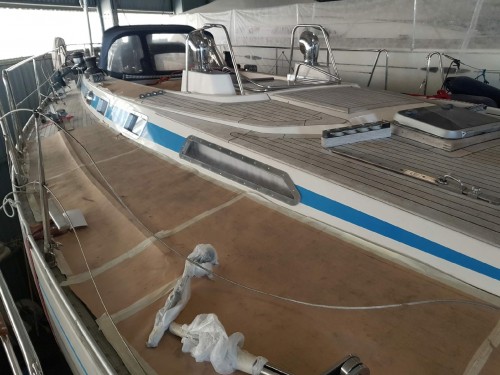 Brushed stainless steel window frames on Frouche |
- Threads : 1715
- Posts : 10273
- Members: 823
- Online Members: 0