Do you want to be informed on new Posts on this Thread? (members only)
| S&S Swan Maintenance - Remakin the skeg on Swan 38 |
|---|
|
Join Date: 21 August 2020
Posts: 5 |
||
|---|---|---|
|
Remakin the skeg on Swan 38 Hello, I am proudly the new owner of Garuda 38/051 I bouht her when she was on the hard and when it came to launch her, some water was coming in, right at the top of the skeg. The only thing that the surveyor spoted before purchase was a broken blister on the side of the skeg. It's a long story and I'll try to be short, but I've seen on thisforum that many people have faced some issues around skeg and rudder. And I'd like to share my experience to help people understand what can happen in this area. At some point, the boat was damaged (reversing into something, got hit by a car while on the hard or whatever). This has weakened the skeg and make a break near the rudder glange. The water started infiltrating the fiber, then the foam above the rudder blade and in the skeg. The foam got full of water and craked. This opened the fiberglass "cap" which covers the foam above the skeg and connect the two hull halves. This is where the water was coming in when I launched the boat. This issue has obviously been there for some times as some attempts to fix it has been made. I have now no choices but to remake the skeg completely as it is now too weak to take the rudder load. I have grinded all rotten and loose fiber and bad looking areas. I ripped the skeg in half I am planning to fully relaminate the skeg (no foam) one halfe at the time so I can keep the shape with the old hafl. I'm just not so sure how to remake the area obove the rudder, where the shaft is going through the hull. Some advice would be much appreciated. Many thanks, Raphael
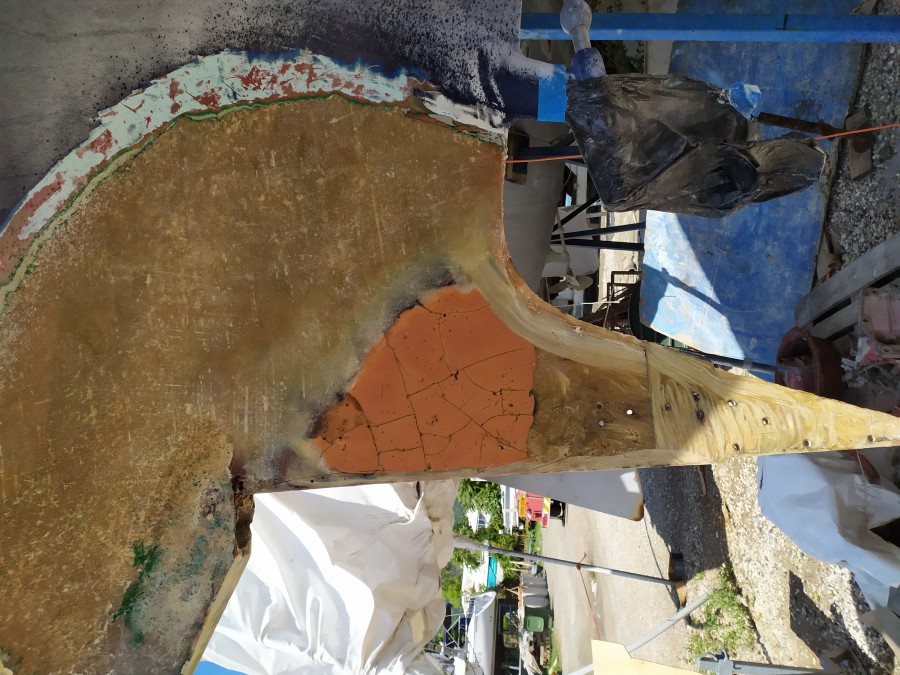 Inside the skeg 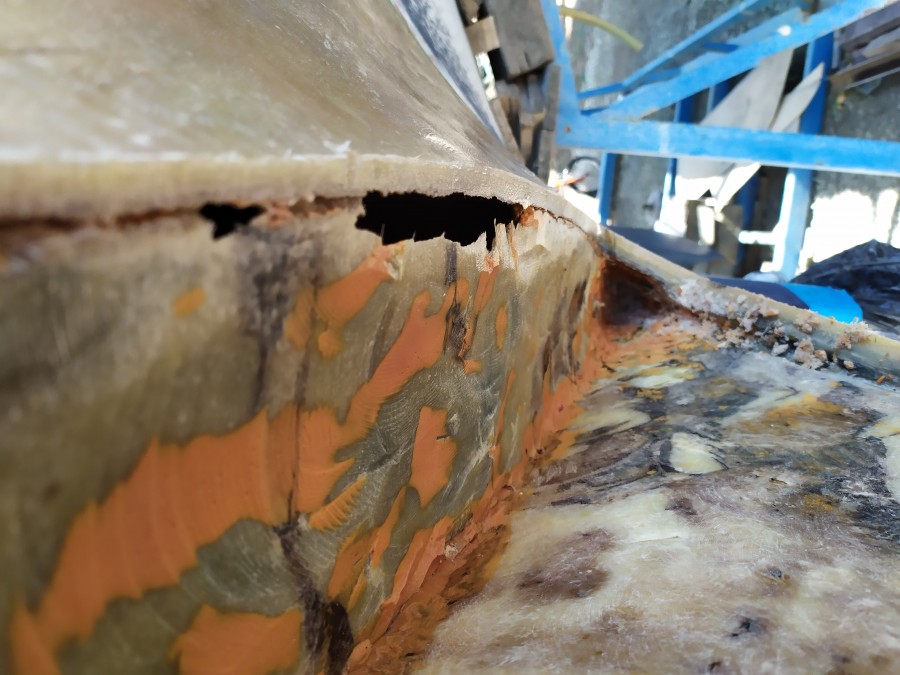 Where the water was coming in 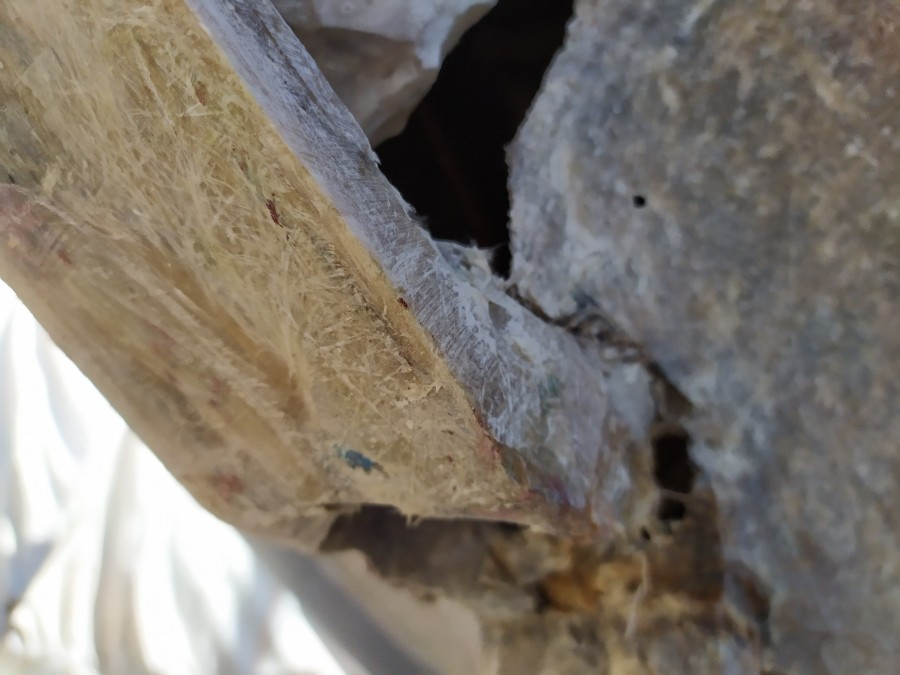 Around rudder shaft |
|
Join Date: 02 January 2008
Posts: 1547 |
||
|---|---|---|
|
Dear Raphael Sorry to hear about this, very unusual with such damage to a rudder skeg.
You say that you plan to relaminate one side at a time, not sure if this is a good idea, because of resin shrinkage the skeg may then be bent after it has cured.
It may be better to laminate both sides at approximately the same pace, or to prefabricate the skeg separately, and finally attach it to the hull.
You could consider adding a transverse web inside the skeg, thereby reducing the amount of laminate needed, and not leaving any foam there.
It is suggested that you use the rudder as template and make the skeg thickness to fit the rudder shape.
Is the rudder stock steel casing still well attached to the laminate? The casing needs to be aligned so the stock upper end fits properly into the deck bearing.
Kind regards
Lars
|
|
Join Date: 21 August 2020
Posts: 5 |
||
|---|---|---|
|
Dear Professor, Thank you very much for your reply and advice. The rudder casing wasn't original as made of fiberglass. I had to remove it so I could remove the rudder, then the shoe and the rudder stock (since I didn't managed to remove the shoe in the first place). I removed the shoe with a jack, wedged on the hull flat area above the rudder (once rudder was removed) However, I haven't got much reference point anymore other than: - the deck bearing, - the line at the rear of the skeg (which I could try to be parallel to) - the screw holes on the skeg (where I could fit the shoe to, in order to get the lower bearing point but this part isn't original) -the bottom line of the hull, just above the rudder (maybe if I put the rudder in position with an even gap at the top that could give me something...) Since I'm resetting the lower and middle bearing, how critical does the lower bearing position needs to be? (If that makes sens). Many thanks Raphael 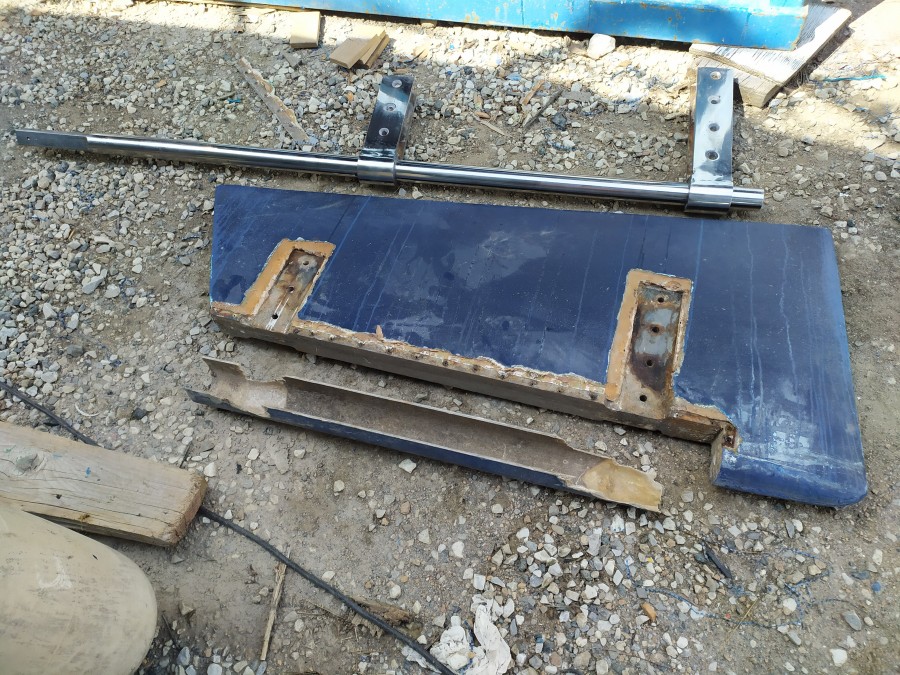 Rudder 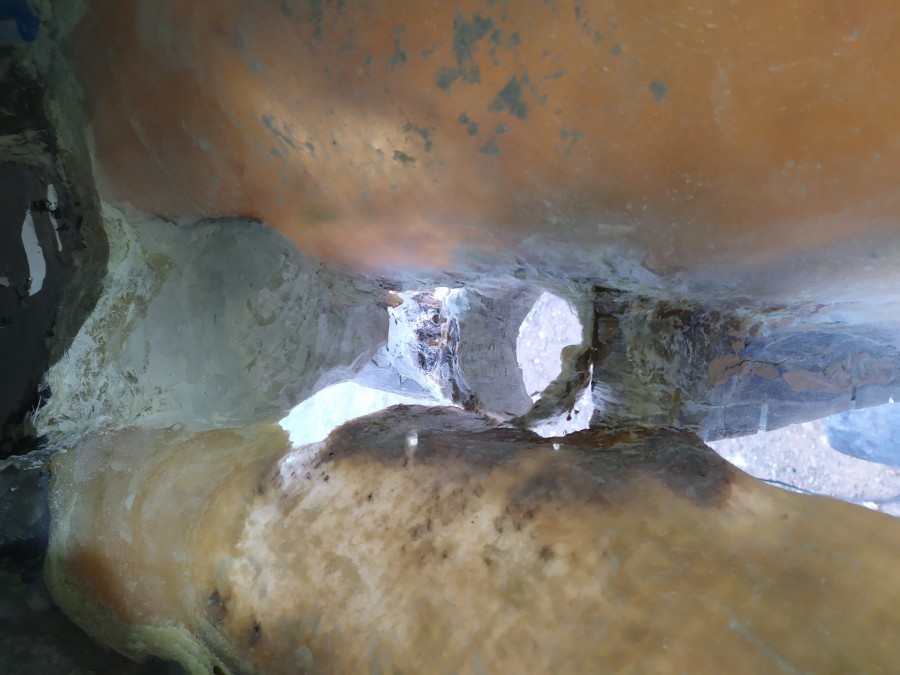 From inside  Shoe ramoval |
|
Join Date: 02 January 2008
Posts: 1547 |
||
|---|---|---|
|
Dear Raphael In the first photo in your first post there are 3 screw holes very near the aft edge of the FRP part inside the shoe, it appears they are not in the bronze shoe? Difficult to see.
The fiberglass casing could well be used if made with proper thickness and having recesses for bearing bushings. Would you know if made with polyester or epoxy resin?
How is the rudder stock sealed at the upper end of the casing?
It is suggested you test fit the rudder, and check if the stock is parallel with the skeg aft edge when the upper end is in the deck bearing, and the lower end in the shoe bearing.
Is there a plastic bearing bushing in the shoe, as well as a washer at the bottom of the shoe recess for the stock? With the washer thickness you can adjust the height of the rudder.
Kind regards
Lars
|
|
Join Date: 21 August 2020
Posts: 5 |
||
|---|---|---|
|
Dear Professor, Yes, the 3 holes are in the bronze shoe as well. I don't know if the rudder casing was made of epoxy or polyester but I had to cut it since not removable. There was no seal at all. Water was going inside of the casing. There is a beaing and a washer in the shoe. I found some guys ("profesionals") to help me on this job. They're thinking about hollowing the rest of the skeg so only one thin wall left. They would use this wall as a mold and laminate the whole skeg starting from inside the hull (on port side) all the way down. Then bild up the skeg until they meet the other side of the hull on the upper part. It doesn't seams such a bad plan to me. Do you think this would work? 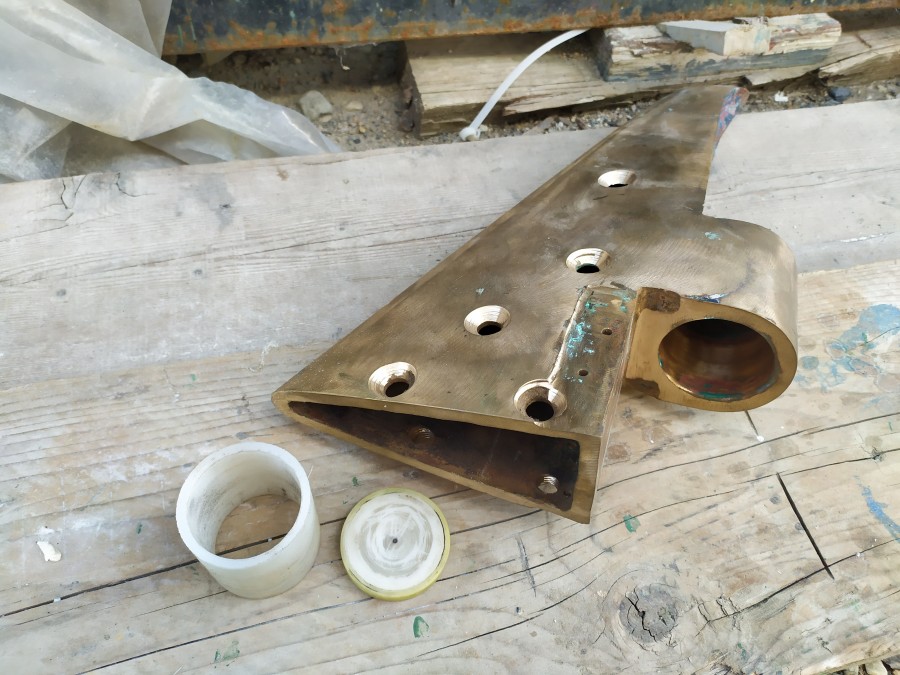 The shoe |
|
Join Date: 02 January 2008
Posts: 1547 |
||
|---|---|---|
|
Dear Raphael
Thank you for the information
I can see that the small holes at the aft edge of the bronze shoe is for the fairing piece screws.
We can come back to the casing later. A seal is needed at the top.
If I understand correctly that the skeg will be solid laminate, it is not advisable to terminate this at the cover laminate joining the two hull halves, the solid laminate must continue and taper off properly above the cover level. This can easily be done for the first half, but not for the second.
Pls discuss this with the professionals.
Kind regards
Lars
|
|
Join Date: 21 August 2020
Posts: 5 |
||
|---|---|---|
|
Dear Professor, You understand correctely. The skeg will be solid laminate, Polyester made. It will start above cover level (as high as possible on the hull) . As you said, it will be easy on one side. On the other one, I believe they will laminate from inside, once the hull level is reached and cary on for few layers on the outside, up on the hull. Kind regards, Raphael |
|
Join Date: 02 January 2008
Posts: 1547 |
||
|---|---|---|
|
Raphael The skeg is a vital structural member under fatigue loading, and it is advisable to use epoxy for ensuring proper attachment to the old hull laminate. The new skeg laminate should terminate on the inside against the aft cabin bunk fronts.
Kind regards
Lars
|
|
Join Date: 21 August 2020
Posts: 5 |
||
|---|---|---|
|
Dear professor, Sorry for the late answer. I've struggled so much to find someone who understan the problem fully and moreover someone who is skilled to fix it. Thankfully, Matteo recomended someone who has done this job before. The plan is (as you suggested in your earlier post) to prefabricate a skeg in a workshop and attach it to the hull. Then reforce from inside and outside. Once the skeg is rebuilt , they will set the rudder stock and sthe 3 bearing (the deck one is now loos as well). Obviously, the skeg will already be aligne with the boat centerline and the rudder stock axel. I will try to post photos of the progress but unfortunately I have to live the place before work completion. Many thanks for your help. it is much appreciated. Kind regards Raphael
|
- Threads : 1715
- Posts : 10273
- Members: 823
- Online Members: 0