Do you want to be informed on new Posts on this Thread? (members only)
| S&S Swan Maintenance - Lewmar Genoa Cars |
|---|
|
Join Date: 20 March 2011
Posts: 88 |
||
|---|---|---|
|
Lewmar Genoa Cars |
|
Join Date: 29 January 2007
Posts: 1019 |
||
|---|---|---|
|
Dear Tonyh, 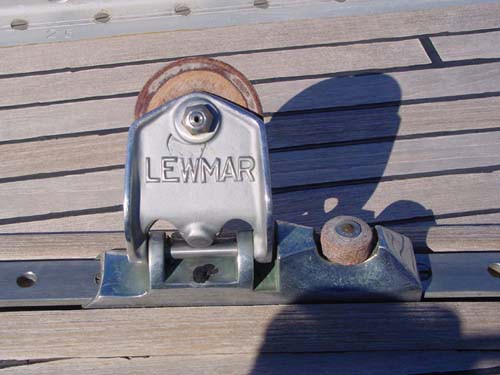 |
|
Join Date: 20 March 2011
Posts: 88 |
||
|---|---|---|
|
|
|
Join Date: 29 January 2007
Posts: 1019 |
||
|---|---|---|
|
Dear Tonyh, |
|
Join Date: 15 April 2011
Posts: 393 |
||
|---|---|---|
|
Dear Tonyh, I have removed my tracks and cars and am also planning to re-chrome so I will anxiously await any advice provided here! Good Luck. Chris |
|
Join Date: 20 March 2011
Posts: 88 |
||
|---|---|---|
|
|
|
Join Date: 15 April 2011
Posts: 393 |
||
|---|---|---|
|
Dear Tonyh, I just examined my Lewmar car and I agree that the spring-loaded pin cannot be removed without damage; from what I can see it is riveted in place. I will spend some more time later today and see if I can come up with another method. Once the entire car is apart, an alternative may present itself. Thank you for the company name that provides sheaves; I need to purchase several for the trim-tab adjustment mechanism. If I have any additional information, I will post a note. Good luck with your project. Fair winds, Chris |
|
Join Date: 27 August 2009
Posts: 44 |
||
|---|---|---|
|
Hi all, I would also be highly interested in finding the most appropriate solution. I have scrolled down this site and I have found a picture of travellers before and after up-grading. You may want to look. You can find this picture under the maintenance section. Go and see under 431/012 Caid. Look forward to hearing any suggestion / reaction. May be Professor could help us... Christophe Antares (41/11) |
|
Join Date: 02 January 2008
Posts: 1547 |
||
|---|---|---|
|
Dear Christophe, Chris, Tony
|
|
Join Date: 15 April 2011
Posts: 393 |
||
|---|---|---|
|
Dear Professor, Thank you. If the rivet could not be re-used, I wonder if the pin could be drilled and tapped and screwed in place. Alternatively, knowing nothing about the chroming process, could the pin be held up and covered? This second alternative is unlikely, I realize. With warm regards, Chris |
|
Join Date: 02 January 2008
Posts: 1547 |
||
|---|---|---|
|
Dear Chris
|
|
Join Date: 29 January 2007
Posts: 1019 |
||
|---|---|---|
|
Dear All, |
|
Join Date: 29 January 2007
Posts: 1019 |
||
|---|---|---|
|
Ten years (or more) after I overhauled the cars. 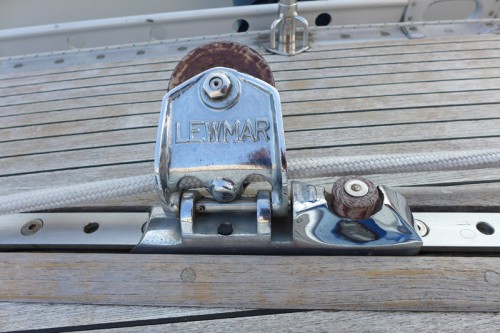 |
|
Join Date: 15 April 2011
Posts: 393 |
||
|---|---|---|
|
Dear Professor, Thank you. Sorry for the delay. No, the knobs do not lock with a 1/4 turn. I can see a possible way to squeeze the rivet at the top and possibly re-use it. If not, as you say, alternatives can be examined at the time. Chris
|
|
Join Date: 29 January 2007
Posts: 1019 |
||
|---|---|---|
|
Dear All, |
|
Join Date: 20 March 2011
Posts: 88 |
||
|---|---|---|
|
|
|
Join Date: 15 April 2011
Posts: 393 |
||
|---|---|---|
|
Dear All, Thank you! I will attempt to get to this job over the next two weeks but I have several ahead of it. The weather here in Delaware has been strange this spring and summer - a lot of rain and then very high temps. I have been trying to get my engine back together but can only stay below in the stifling air for brief periods. Yesterday, Alex, my son, and I successfully applied the new gaskets and seals for the oil sump - that was a much bigger job than I thought. Today, with luck, I will apply the rear mail oil seal and then reassemble the engine! After that - fun jobs like this one! Chris |
|
Join Date: 15 April 2011
Posts: 393 |
||
|---|---|---|
|
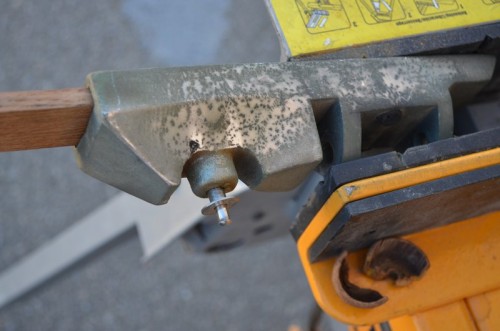
Dear All, I spent a little time with the cars this weekend and attempted to carefully reshape the rivet heads up so that I could remove the pin knobs - no luck. This is a SS pin and is very tough. It will take a lot of force to crush the head before the knobs may be removed. I suspect that the Professor's alternative solutions may be investigated before I am finished with this project. Next step - brute force. Chris |
|
Join Date: 15 April 2011
Posts: 393 |
||
|---|---|---|
|
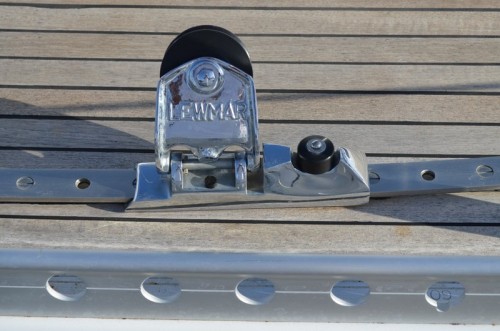
Dear All, I worked on the cars for a little while in between other projects (all for the home) and here are a few pictures. The results are mixed and I would suggest that this is not an easy task since quite a bit of force was used to reshape the rivets. In the end, removing the pull knob is just one step of many. Removing the sheaves is turning out to be a project unto itself! I will post additional pictures on that when it's finished. 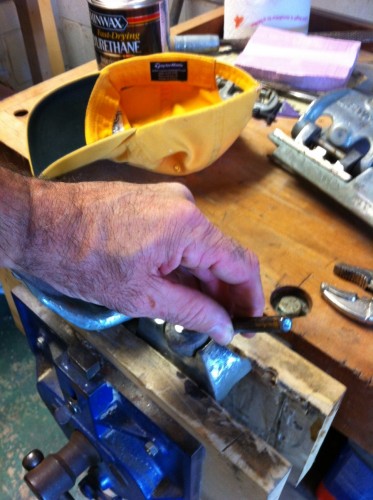 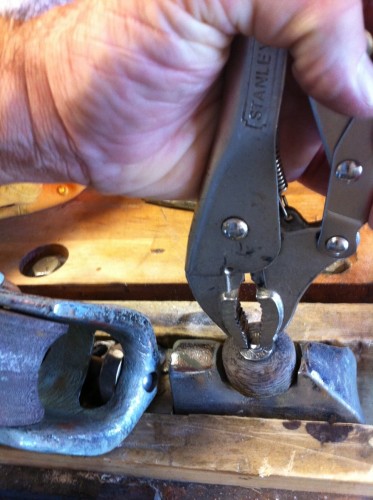 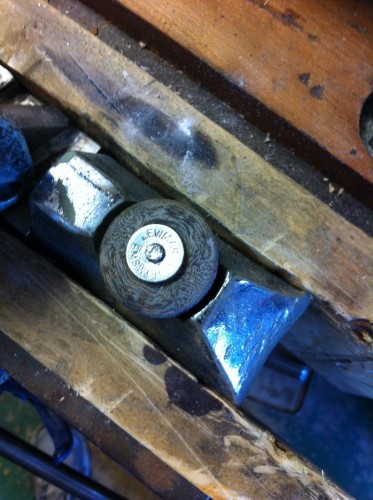 |
|
Join Date: 20 March 2011
Posts: 88 |
||
|---|---|---|
|
  |
- Threads : 1702
- Posts : 10217
- Members: 820
- Online Members: 0