Do you want to be informed on new Posts on this Thread? (members only)
| S&S Swan Maintenance - Sliding fwd hatch of Swan 47 leaks |
|---|
|
Join Date: 26 March 2008
Posts: 69 |
||
|---|---|---|
|
Sliding fwd hatch of Swan 47 leaks Hello: On longer passages upwind, particularly if the bow if burried repeatedly, our forward hatch leaks. Some folk tell me this is a "well known issue and the only answer is to replace the hatch." Do other people with sliding forward hatches have any experience in this matter? I look forward to your comments. Best regards, P Milo 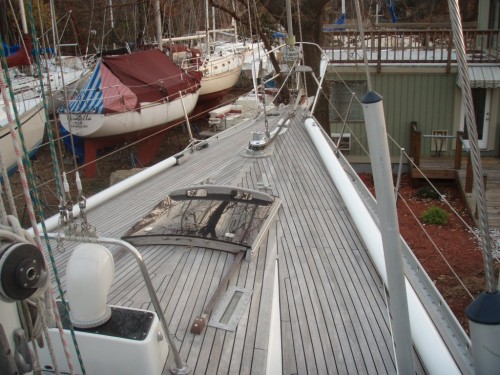 |
|
Join Date: 01 February 2007
Posts: 35 |
||
|---|---|---|
|
Dear Milo,
Yes! Same problem! We are considering a new hatch.
Many regards Sidse & Carsten Cygnus Pe�a 47 # 20 |
|
Join Date: 01 February 2007
Posts: 35 |
||
|---|---|---|
|
Hi again Milo,
I see that you have a anchor winch. Please describe where you put your chain. Do you have a chain gate or do you let the chain directly down i the forward room? We would be happy to see some pictures, thanks.
Many regards Sidse & carsten |
|
Join Date: 30 January 2007
Posts: 462 |
||
|---|---|---|
|
Hello friends, |
|
Join Date: 02 January 2008
Posts: 1547 |
||
|---|---|---|
|
Daniel already described the proper approach very well. I would like to point out two important things - that the hatch actually drops down on the seals when closed, and that it is forced down so seals are properly compressed. The latter can be done in several ways, a good one is to install latches at each corner with recessed hooks in the perspex Kind regards Lars |
|
Join Date: 26 March 2008
Posts: 69 |
||
|---|---|---|
|
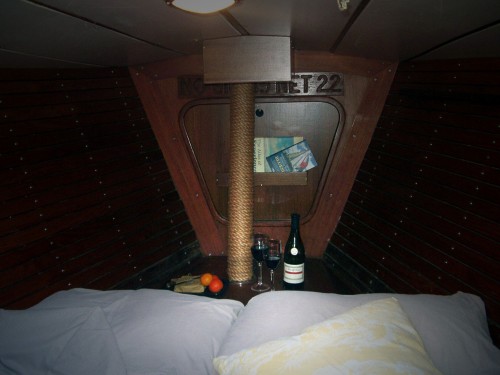
Dear Sidse and Carsten (on Cygnus Pena): As you will see from the attached pic, the chain runs down the chimney in the forward cabin. This sytem works well with two exceptions: 1. Unlike my land-loving friends on the mainland USA, I sleep every night with my wife and a silver pole. Some nights we have our heads facing forward, but on other nights we kick the pole around with our feet. Not sure which is best just yet..... 2. On one occassion while raising teh anchor, the chain fell in such a manner that the chain formed a perfect pyramid in the anchor well. The well would not accept anymore chain as it was jammed at the bottom of the chimney. I realized what was happening and quickly went below and corrected the siutaion (pushed the chain pyramid over). We have 200 feet of chain and usually lay out about 100-125 feet. I hope this helps. P Milo s/v The Last of the Normal People Swan 47/048 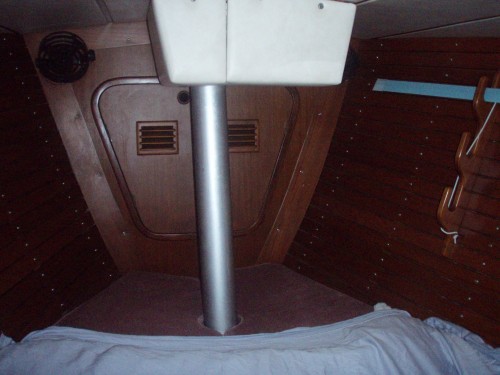 |
|
Join Date: 26 March 2008
Posts: 69 |
||
|---|---|---|
|
Oh, one other pic of the anchor well. Cheers. P Milo 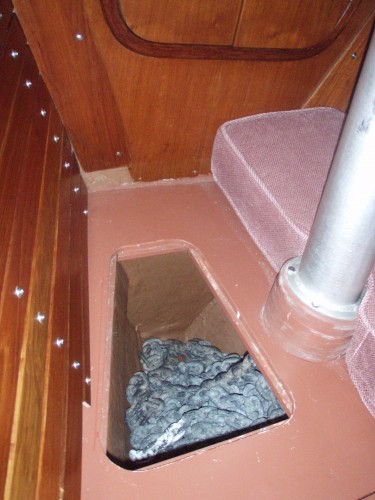 |
|
Join Date: 26 March 2008
Posts: 69 |
||
|---|---|---|
|
Dear Daniel and Lars: Thank you for your input. We have 4 latches and all manner of gaskets. I will recheck them for integrity. Our hatch works much as you described it with the hatch dropping or dipping onto the seals, etc... I do not want to replace the hatch, but we are going off shore next year and the leak was an issue when we sailed from Annapolis to St. Thomas (12 day trip). Stay tuned. P Milo s/v The Last of the Normal People Swan 47/048 |
|
Join Date: 01 February 2007
Posts: 35 |
||
|---|---|---|
|
Dear Milo,
Thank you very much for your pics. I appreciate your quick answer. I don�t know why, but when I suggested a brass pole, my wife did�nt like the idea. :-). Why do you not use the forward room? Once again, thanks for your promt answer. Many regards Carsten |
|
Join Date: 26 March 2008
Posts: 69 |
||
|---|---|---|
|
Hi Carsten: I cannot think why your wife would not approve. :) The configuration we have is as it was when we bought our boat 18months ago. The forward cabin was renovated long before we came along. I imagine you may be able to use the most forward locker for chain storage, but weight may be an issue from a safety (bow more likely to bury) and also speed perspective (if you race). We keep our deck wash hose in the forward compartment. But as I say, this was all designed and built many years before us. Cheers, Milo |
|
Join Date: 02 January 2008
Posts: 1547 |
||
|---|---|---|
|
Dear Carsten and Milo A chain box needs to be high and narrow in order to function properly and not entangle the chain when the boat heels. Further some empty space above the stowed chain is required to avoid blocking of the chain pipe as described above. The height requirement is such that it usually can not be met where the fore cabin is used for sleeping. If chain size and length is known guidelines can be given for box dimensions Kind regards Lars |
|
Join Date: 05 February 2007
Posts: 102 |
||
|---|---|---|
|
Hello to All regarding anchor chains....
 |
|
Join Date: 05 February 2007
Posts: 102 |
||
|---|---|---|
|
Dear Milo,
|
|
Join Date: 02 January 2008
Posts: 1547 |
||
|---|---|---|
|
Jayne Recommended box dimensions for your chain size and length: Square cross section with 12" side, or corresponding circular area, and 73" high. The box needs proper support also sideways, chain is quite heavy. Makes it less noisy if the inside is painted with deck mastic. Chain dead end could be attached with a piece of line to an eye inside the box - when all chain is paid out the line will come out on deck, and can be cut with a knife in an emergency. Chain pipe to be sealed in a seaway, or a pump installed for the box. Lars
|
|
Join Date: 02 January 2008
Posts: 1547 |
||
|---|---|---|
|
Jayne The material around the hatch is Micarta, but you can also use acrylic. The machining of Micarta produces bad fumes and some shops refuse to work with the material. I guess the new hatch is of scratch-resistant acrylic with a surface treatment. Lars |
|
Join Date: 26 March 2008
Posts: 69 |
||
|---|---|---|
|
Jayne, Lars, Daniel and company: I am attaching some pics of the forward hatch as there seems to be some interest in this matter. Pics from anyone else would help at this end, too. Lars has described the construction material, thankfully, as my description would have served to confuse and not clarify. Still very new at all this big boat stuff you know. Hope I am not taking up too much space with the pics. Please let me know if this is an issue. Looking at the black seals, I think they are weathered and need replacing. Any thoughts on who I contact for replacement seals? Is there a way to make the seals? Cheers, P Milo 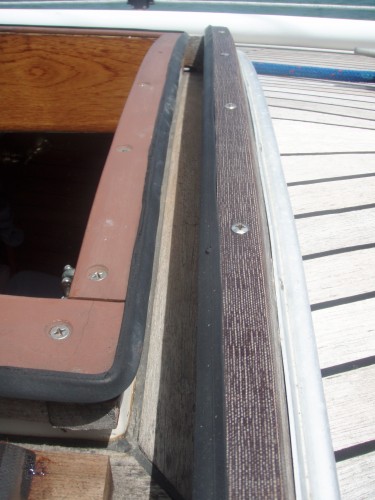 |
|
Join Date: 26 March 2008
Posts: 69 |
||
|---|---|---|
|
Forward hatch closed. Milo. 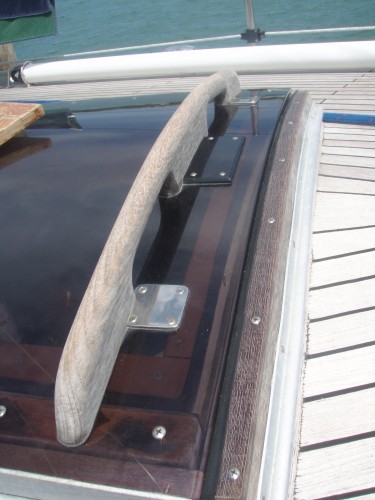 |
|
Join Date: 26 March 2008
Posts: 69 |
||
|---|---|---|
|
Forward hatch closed (from above). Milo 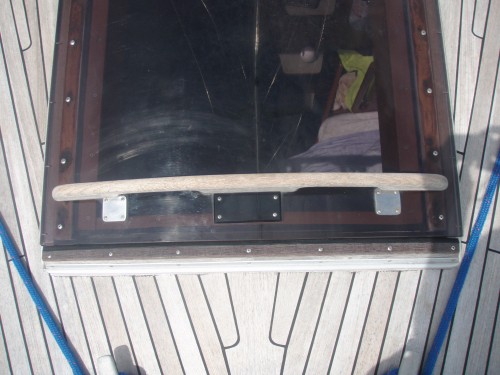 |
|
Join Date: 26 March 2008
Posts: 69 |
||
|---|---|---|
|
Forward hatch closed (looking aft). Milo 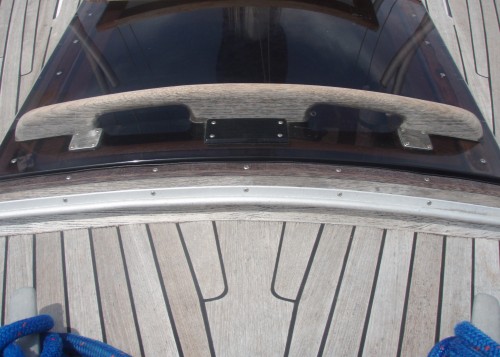 |
|
Join Date: 29 January 2007
Posts: 1033 |
||
|---|---|---|
|
Dear Milo
|
|
Join Date: 02 January 2008
Posts: 1547 |
||
|---|---|---|
|
Dear all Good pictures. Pls also note the aluminium grooved section on three sides outside the hatch frame. This section is intended for a canvas dodger over the hatch, and particular care has been taken to make the corners watertight - this detail actually was one of Rod Stephens inspection matters. The dodger has boltrope along the edges fitting into the groove and keeps most of the water away from the hatch, this reduces the watertightness requirements. With the dodger extended some distance aft, and fitted with battens holding it up the hatch can even be kept slightly open for ventilation at sea. Lars |
- Threads : 1715
- Posts : 10273
- Members: 823
- Online Members: 0